
Pi-hole is used by many people around the world for many purposes. Most commonly, it’s used as an ad-blocker on your local network (blocking things such as ads, trackers, and malicious domains), but can also be used in lab environments with custom DNS records.
The IP of the Pi-hole is configured as the DNS server on your client devices, and the request is sent to the Pi-hole, and then based on the rules on your Pi-hole, it’ll forward the request to a DNS server of your choice, block the traffic, or reply with custom records.
This blog post will show you how to install and configure Pi-hole, see logging, and set up a custom DNS record for your local environment.
Haven’t installed Raspberry Pi OS yet? Installing Raspberry Pi OS 6.12 and SSHing into a Raspberry Pi
Installing Pi-hole
As always, start the updating/downloading of anything by running an update, and an upgrade on the system (-y will just say yes to everything that was asked for)
sudo apt update && sudo apt upgrade -yRun the curl script created by the owners of Pi-hole, which will eventually bring up a GUI to configure.
root@raspberrypi:/home/burstbytes# curl -sSL https://install.pi-hole.net | bash

[✓] Root user check

    .;;,.
    .ccccc:,.
     :cccclll:.      ..,,
      :ccccclll.   ;ooodc
       'ccll:;ll .oooodc
         .;cll.;;looo:.
             .. ','.
            .',,,,,,'.
          .',,,,,,,,,,.
        .',,,,,,,,,,,,....
      ....''',,,,,,,'.......
    .........  ....  .........
    ..........      ..........
    ..........      ..........
    .........  ....  .........
      ........,,,,,,,'......
        ....',,,,,,,,,,,,.
           .',,,,,,,,,'.
            .',,,,,,'.
              ..'''.

[i] SELinux not detected
[✓] Update local cache of available packages

[✓] Checking apt-get for upgraded packages… up to date!
It should pop up around here. From here, lets follow the GUI config options. Most of these options are personal preference, but I’ll explain my choices as I go through them. All of these settings can be changed later.
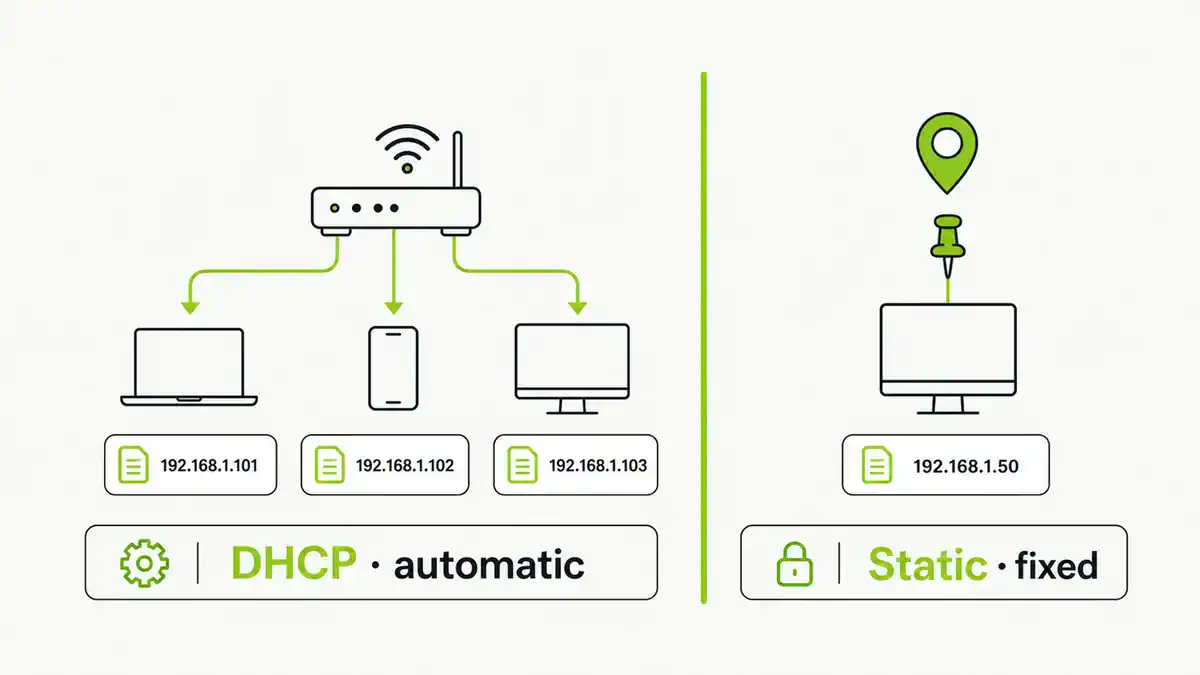
Click OK, then it will tell you about needing a Static IP address (since clients will use that IP to resolve hostnames). Static IP or a DHCP reserveration is perfectly fine. Once you’ve confirmed that, click Continue.
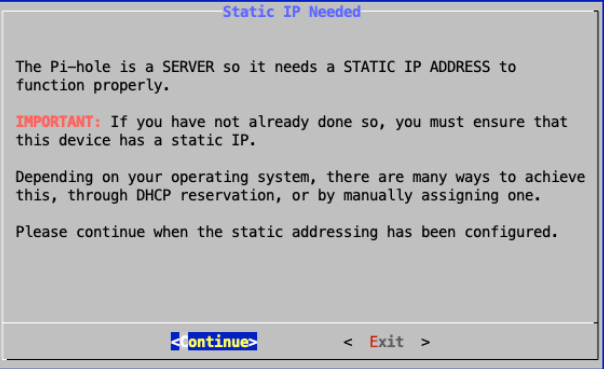
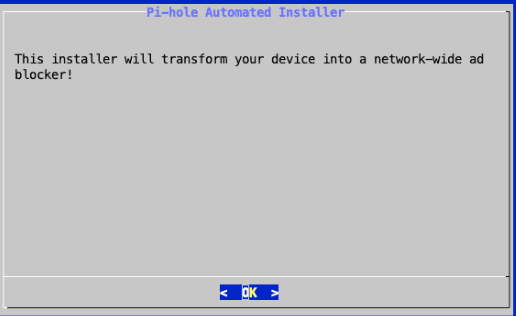
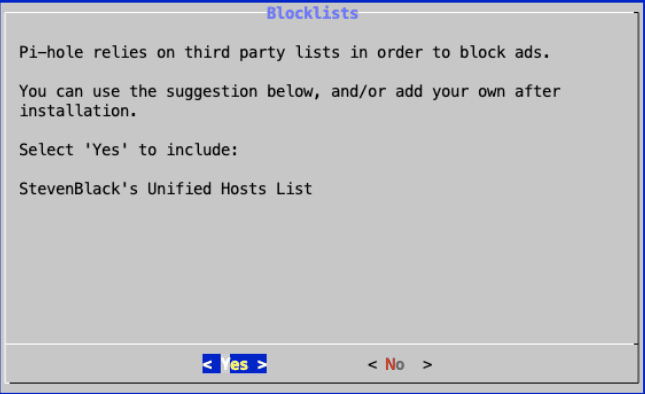
You can choose to include a default third party list, or install your own later. I decided to include the list – Click Yes/No accordingly.
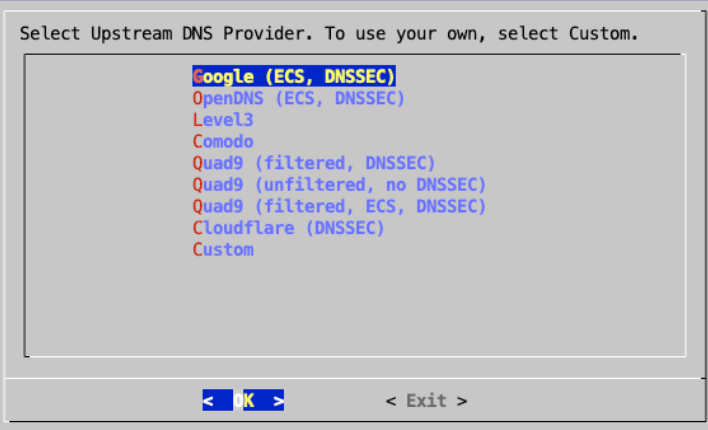
Choose your upstream DNS provider. This is the DNS server that the Pi-Hole itself will use for requests that it does not have locally. I chose Google’s DNS, but you can choose any, and then click OK.
If you are not sure which upstream resolver to use, compare the current options in Best Public DNS Providers for 2026. If you are choosing a self-hosted blocker before installing anything, compare Pi-hole vs AdGuard Home. After Pi-hole is installed, use Best 2026 Pi-hole Blocklists to choose a blocklist tier that matches how much allowlist maintenance you want. If Pi-hole installs correctly but ads still get through, use Pi-hole Not Blocking Ads to check whether devices are actually using it for DNS.
Enable query logging – click Yes to this so that logging is enabled for each Query.
Configure a Privacy Mode – which basically just says what logging level is going to show. Level 0 shows everything, Level 3 anonymizes everything. I set it to Level 0, and clicked Continue.
Then you’ll be done! It’ll give you the URL that you can use to further configure, which is just http://IPADDR:80/admin – in my case, http://192.168.10.11:80/admin.

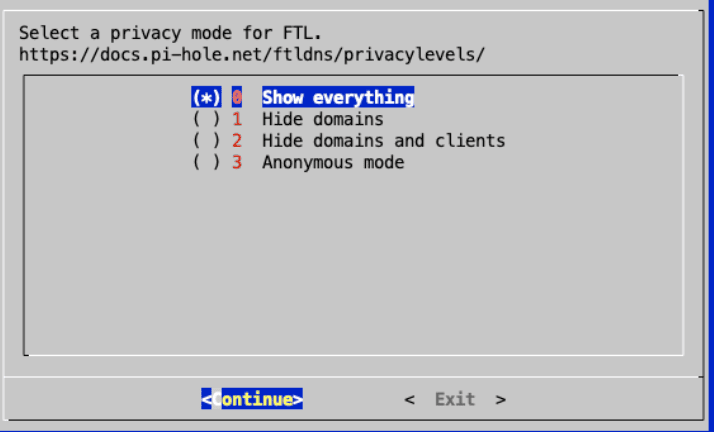
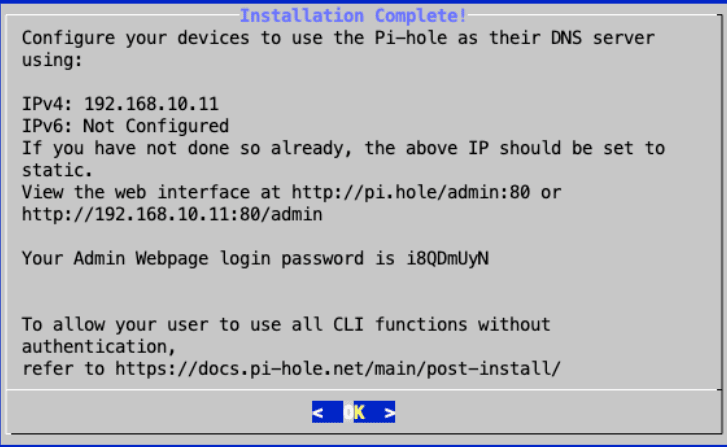
The full output of the terminal can be seen here.
[✓] Building dependency package pihole-meta.deb
[✓] Installing Pi-hole dependency package

[i] IPv4 address: 192.168.10.11/24
[i] Unable to find IPv6 ULA/GUA address
[i] IPv6 address:
[i] Using upstream DNS: Google (ECS, DNSSEC) (8.8.8.8, 8.8.4.4)
[i] Installing StevenBlack's Unified Hosts List
[i] Query Logging on.
[i] Using privacy level: 0
[✗] Check for existing repository in /etc/.pihole
[i] Clone https://github.com/pi-hole/pi-hole.git into /etc/.pihole…HEAD is now at cef7fd4 Pi-hole core 6.1.4 (#6347)
[✓] Clone https://github.com/pi-hole/pi-hole.git into /etc/.pihole

[✗] Check for existing repository in /var/www/html/admin
[i] Clone https://github.com/pi-hole/web.git into /var/www/html/admin…HEAD is now at cc1cc28 Pi-hole Web v6.2 (#3444)
[✓] Clone https://github.com/pi-hole/web.git into /var/www/html/admin

[✗] Checking for group 'pihole'
[✓] Creating group 'pihole'
[✓] Creating user 'pihole'

[i] FTL Checks…

[✓] Detected ARMv6 architecture
[i] Downloading and Installing FTL…transferred… Failed to stop pihole-FTL.service: Unit pihole-FTL.service not loaded.
[✓] Downloading and Installing FTL
[✓] Installing scripts from /etc/.pihole

[i] Installing configs from /etc/.pihole…

[✓] Installing latest Cron script

[✓] Installing latest logrotate script
[✓] man pages installed and database updated
[i] Testing if systemd-resolved is enabled
[i] Systemd-resolved is not enabled
[i] Restarting services…
[✓] Enabling pihole-FTL service to start on reboot…
[✓] Restarting pihole-FTL service…
[✓] DNS resolution is available

[✗] Migrating the list's cache directory to new location
[i] Creating new gravity database
[i] Migrating content of /etc/pihole/adlists.list into new database
[✓] Deleting existing list cache
[i] Neutrino emissions detected…

[✓] Preparing new gravity database
[✓] Creating new gravity databases
[✓] Pulling blocklist source list into range
[i] Using libz compression

[i] Target: https://raw.githubusercontent.com/StevenBlack/hosts/master/hosts
[✓] Status: Retrieval successful
[✓] Parsed 230924 exact domains and 0 ABP-style domains (blocking, ignored 1 non-domain entries)
Sample of non-domain entries:
- fe80::1%lo0

[✓] Building tree
[i] Number of gravity domains: 230924 (230924 unique domains)
[i] Number of exact denied domains: 0
[i] Number of regex denied filters: 0
[i] Number of exact allowed domains: 0
[i] Number of regex allowed filters: 0
[✓] Optimizing database
[✓] Swapping databases
[✓] The old database remains available
[✓] Cleaning up stray matter

[✓] Done.

[i] You may now configure your devices to use the Pi-hole as their DNS server
[i] Pi-hole DNS (IPv4): 192.168.10.11
[i] If you have not done so already, the above IP should be set to static.
[i] View the web interface at http://pi.hole:80/admin or http://192.168.10.11:80/admin

[i] Web Interface password: i8QDmUyN
[i] This can be changed using 'pihole setpassword'

[i] To allow your user to use all CLI functions without authentication, refer to
our documentation at: https://docs.pi-hole.net/main/post-install/

[i] The install log is located at: /etc/pihole/install.log
[✓] Installation complete!
root@raspberrypi:/home/burstbytes#
Changing password and Logging into the website
Once you’ve fully installed it, lets first set a new password, and then access the GUI at http://192.168.10.11:80/admin, and log in.
root@raspberrypi:/home/burstbytes# pihole setpassword Test
[✓] New password set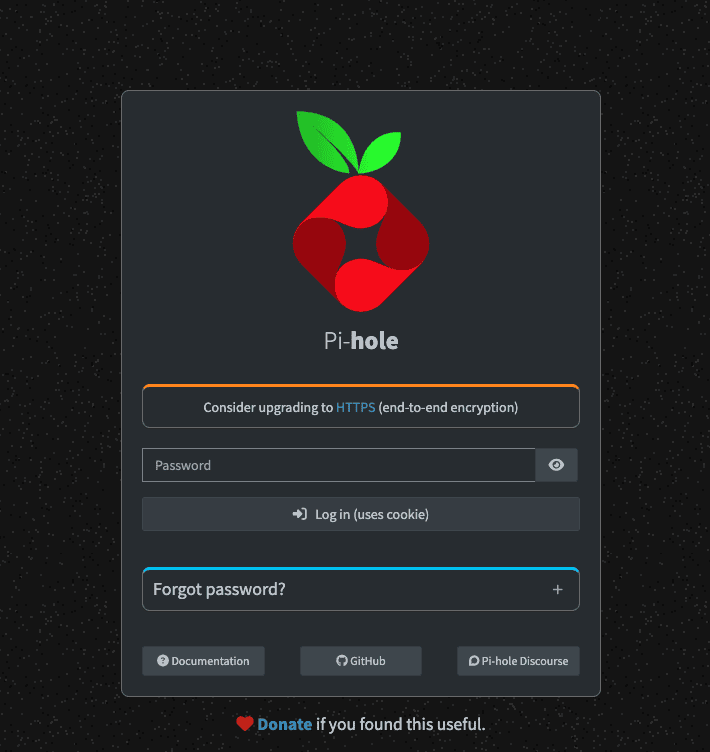
Adding Custom DNS records
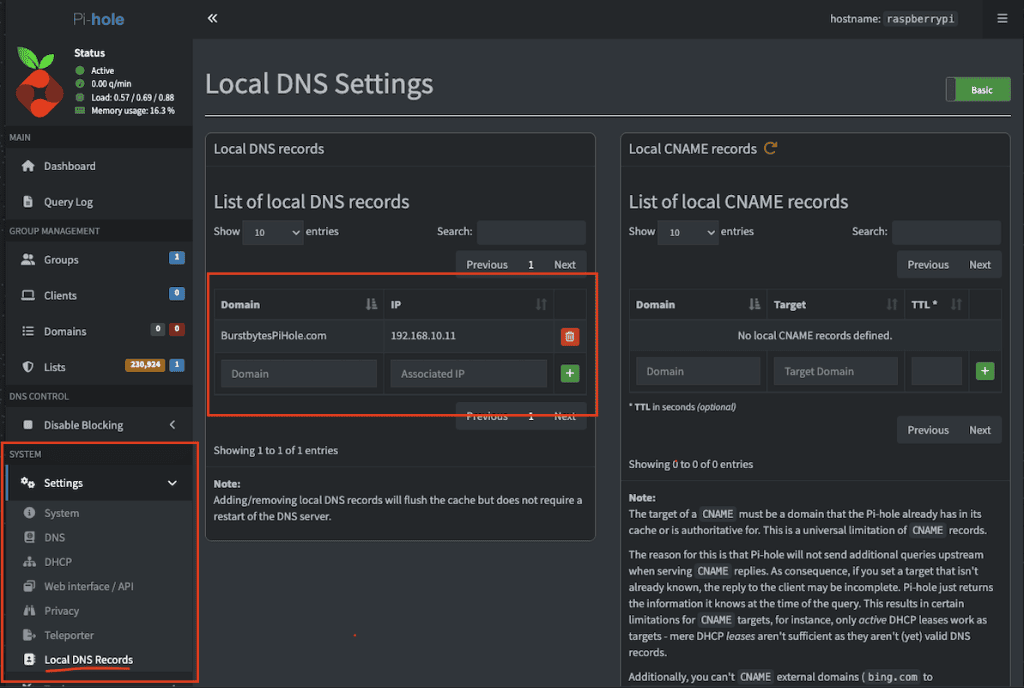
To add a Custom DNS record, go to System –> Settings –> Local DNS records, and add the domain and IP that you want it to resolve to. CNAME records can also be configured. Save these, and then we’ll go to some testing. In this case, I added “burstbytespihole.com” to resolve to 192.168.10.11.
Testing the DNS server
From another device that can reach the DNS server, we can perform some tests to see if everything is working. Ensure reachability first with a ping (assuming your device allows pings), and then try some DNS resolutions.
root@jburst: ping 192.168.10.11
PING 192.168.10.11 (192.168.10.11): 56 data bytes
64 bytes from 192.168.10.11: icmp_seq=0 ttl=64 time=25.791 ms
64 bytes from 192.168.10.11: icmp_seq=1 ttl=64 time=7.311 ms

root@jburst: nslookup burstbytespihole.com 192.168.10.11
Server: 192.168.10.11
Address: 192.168.10.11#53

Name: burstbytespihole.com
Address: 192.168.10.11

root@jburst: nslookup burstbytes.com 192.168.10.11
Server: 192.168.10.11
Address: 192.168.10.11#53

Non-authoritative answer:
Name: burstbytes.com
Address: 104.21.80.1
Name: burstbytes.com
Address: 104.21.32.1
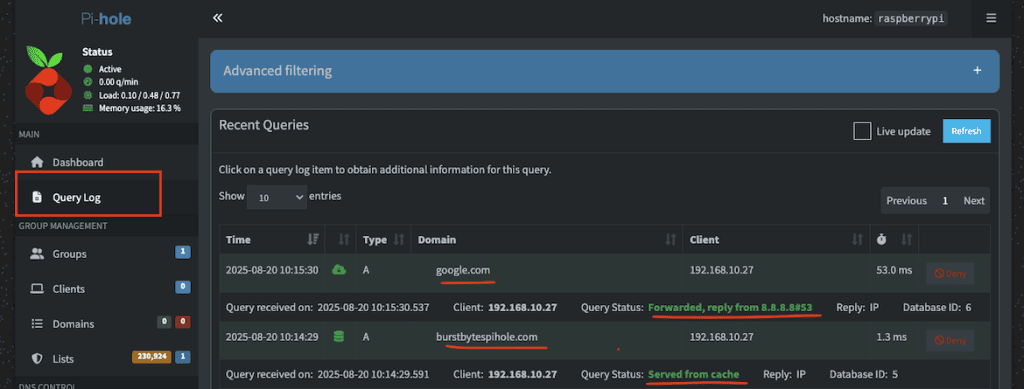
burstbytespihole.com resolved to the configured 192.168.10.11, and google.com was able to be resolved as well. Checking the logs on the pihole:
root@raspberrypi:/etc/pihole# cat /var/log/pihole/pihole.log
Aug 20 10:38:08 dnsmasq[3102]: query[A] burstbytespihole.com from 192.168.10.27
Aug 20 10:38:08 dnsmasq[3102]: /etc/pihole/hosts/custom.list burstbytespihole.com is 192.168.10.11
Aug 20 10:38:21 dnsmasq[3102]: query[A] burstbytes.com from 192.168.10.27
Aug 20 10:38:21 dnsmasq[3102]: forwarded burstbytes.com to 8.8.8.8
Aug 20 10:38:21 dnsmasq[3102]: reply burstbytes.com is 104.21.80.1
Aug 20 10:38:21 dnsmasq[3102]: reply burstbytes.com is 104.21.32.1
The IP of burstbytespihole.com is pulled from /etc/pihole/hosts/custom.list, and it got the IPs for burstbytes.com from 8.8.8.8.
Packet captures show the client device sees both DNS requests coming from 192.168.10.11.
root@jburst: tcpdump -nei en0 port 53 and host 192.168.10.27
tcpdump: verbose output suppressed, use -v[v]… for full protocol decode
listening on en0, link-type EN10MB (Ethernet), snapshot length 524288 bytes
10:44:04.463919 52:c1:22:ec:56:23 > b8:27:eb:ff:87:7c, ethertype IPv4 (0x0800), length 80: 192.168.10.27.57563 > 192.168.10.11.53: 18421+ A? burstbytespihole.com. (38)
10:44:04.576290 b8:27:eb:ff:87:7c > 52:c1:22:ec:56:23, ethertype IPv4 (0x0800), length 96: 192.168.10.11.53 > 192.168.10.27.57563: 18421* 1/0/0 A 192.168.10.11 (54)
10:44:10.931601 52:c1:22:ec:56:23 > b8:27:eb:ff:87:7c, ethertype IPv4 (0x0800), length 74: 192.168.10.27.53620 > 192.168.10.11.53: 35386+ A? burstbytes.com. (32)
10:44:10.968614 b8:27:eb:ff:87:7c > 52:c1:22:ec:56:23, ethertype IPv4 (0x0800), length 186: 192.168.10.11.53 > 192.168.10.27.53620: 35386 7/0/0 A 104.21.80.1, A 104.21.32.1, A 104.21.16.1, A 104.21.64.1, A 104.21.112.1, A 104.21.96.1, A 104.21.48.1 (144)
The request to burstbytes.com is sent to 8.8.8.8, but the other request to my custom DNS was not forwarded out to Google.
root@raspberrypi:/etc/pihole# tcpdump -nei wlan0 port 53 and host 8.8.8.8
tcpdump: verbose output suppressed, use -v[v]… for full protocol decode
listening on wlan0, link-type EN10MB (Ethernet), snapshot length 262144 bytes
10:44:11.070257 b8:27:eb:ff:87:7c > 08:f1:b3:dc:fa:c0, ethertype IPv4 (0x0800), length 85: 192.168.10.11.49389 > 8.8.8.8.53: 15877+ [1au] A? burstbytes.com. (43)
10:44:11.179065 08:f1:b3:dc:fa:c0 > b8:27:eb:ff:87:7c, ethertype IPv4 (0x0800), length 197: 8.8.8.8.53 > 192.168.10.11.49389: 15877 7/0/1 A 104.21.80.1, A 104.21.48.1, A 104.21.16.1, A 104.21.64.1, A 104.21.96.1, A 104.21.112.1, A 104.21.32.1 (155)
On the GUI, you can see these requests in the Query Logging page.
Conclusion
Installing and using Pi-hole is a quick way to manage your home networks ads, or to set up in a lab environment to easily test custom domains. Pi-hole has made it super easy to install, especially on Raspberry Pi OS, and it’s a versatile part of anyone’s toolkit who works with DNS (even infrequently!)
Once it is running, the natural next step for privacy is making Pi-hole resolve queries itself — see how to set up Pi-hole with Unbound for recursive DNS.
Get notified whenever I post something new. No spam, and it helps a lot!


Leave a Reply